Sunday, November 30, 2014

CT Tag - Time Stands Still w/ Extras & Matching Stat


Hey everyone. I have a new CT tag featuring the art of Delphine Demers and a beautiful scrap kit by WD Designz


I also have extras and a matching Incredimail stat to share with you. You can find the extras on my Fotki HERE, click the stat preview below to download the IMF file.

http://www.4shared.com/file/_QhYaAqsce/ddtimestandsstill.html


Saturday, November 29, 2014

Numbers - PTU Animation

This tutorial was written by me on 11/29/2014 and assumes you have working knowledge of PSP. Any similarities to other tuts is purely coincidental and not done on purpose.


For this tut you will need:
PSP - I use version X3 but most versions will do
Tube of choice - I'm using the artwork of Mashi.
You can purchase this tube at CDO. Do not use this tube without purchasing a license first.
Please note that all Mashi tubes are only available till Dec 26th, 2014
  Animation 27 (Pack 9) by SophisticatSimone, also available at CDO
Animation Shop
Font of choice, I used Gasoline Alley NF
Filters used:
 Mura Meister Copies
Eye Candy 5 Impact
Xero Porcelain
Eye Candy 4000 Gradient Glow

Let's begin, remember to save often.

Open your tube and template in psp. Duplicate both and close the originals.

Working on your template, click on your Bottom Wave Line layer and move it up in your layer palette until it's above the Top Wave layer. Activate the Top Wave Line layer and merge down 1 time. Rename this layer Wave Line. Activate your Top Wave layer and merge down 1 time. Rename this layer Wave.

With your Wave layer active, copy and paste your tube as a new layer. If using same tube as mine, click on the link toggle to change it to none. No clue why this tube has a layer lock:


Apply Mura Meister Copies, Wallpaper rotate at default settings. Apply a Radial Blur at Zoom and strength at 30%. All other options 0.

Activate your Wave layer. Select all, float, defloat. Invert Selection, activate your blurred layer and press delete. Deselect.

Activate your wave Line layer. Select all, float, defloat. Add a new raster layer. Go to selections, Modify, Smooth and apply these settings:


Flood fill with a dark color from your tube. I used black. Deselect. Activate the Wave Line layer again. Press delete on your keyboard 1 time. Activate the flood filled layer and merge down 1 time.

Apply Eye Candy 5 Impact, Glass. Click on the Settings tab and click on Opaque Black with Reflection. Click on the Basic tab. If your line wasn't already black, then click on the Glass Color box and change it back to the color you used. Change Drop Shadow Opacity to 0. Click ok.

Copy and paste your tube as a new layer again. Remember to click the link toggle if needed. Resize as needed. I resized mine 70%. Move it to the left side of the tag. Duplicate your tube. Resize again, I resized mine 90%. Move this duplicated tube over to the right side of your tag and move this layer under the Wave Line layer. Rename this layer small tube.

Now I chose to rotate my tube 15 degrees to the left, this is optional. If you do this be sure to sharpen 1 time. Position your tube on the top part of the Wave. See my tag for reference. When you have it where you like it, duplicate this tube. Hide the duplicate for now.

Now with the original small tube layer active. Click on your selection tool and select around the excess tube that covers the bottom part of the Wave:


Press delete 1 time and deselect. Now activate and unhide the copy of your small tube. Move it down so it's over the bottom part of the wave as you like it. Again, use your selection tool to select and remove the excess above:


Deselect when done and you should have something like this:


Make sure your copy of small tube is active and merge down one time. Activate the Wave layer. Select all, float, defloat. Invert selection, activate your small tube layer and press delete. Deselect. Apply Xero Porcelain at default settings but move the blue slider to 0. Change the blend mode to Multiply and reduce the opacity to 60.

Activate your Wave Line layer. Apply Eye Candy 4000 Gradient Glow with these settings and the glow width at 3:


Activate your main tube layer. Apply the Xero Porcelain again. Give it a drop shadow of 0, 0, 100, 15.

Your main tube should be the top layer in your palette. Add a new raster layer. Select all. Flood fill with black. Contract selection by 1. Keep selected. Add a new raster layer. Flood fill with the same color you used for the Wave Line or white if you used black like I did. Contract by 3. Add a new raster layer again. Flood fill with the black. Contract by 1 again and press delete. Activate the white (or colored layer), press delete and then finally activate the first black layer and press delete. Deselect.

Activate the white (or colored layer) and give it noise at Gaussian, 100% and monochrome checked. Now activate the top black layer and merge down 2 times. Rename this layer border.

Give your border layer the same drop shadow as your tube but change the opacity to 80.

Add your copyright, license info and tagger's mark.

Add your name using colors from your tube. Give it an inner bevel of choice. I used this one:


Then give it a gradient glow, again with the glow width at 3:


Then give your name a drop shadow. I chose to use the same one I did for the border.

Now if you choose not to animate then you can just merge all and save as jpg. Otherwise, continue with instructions below.

Open the psd or mng file for your animation in AS. Select all. Go back to PSP. Hide all layers except Main Background, Black Lines and the original Wave layer. Copy merged and paste as a new animation in AS. Now our animation has 13 frames so our tag must have 13 frames as well.

Hold down ctrl and shift and press L repeatedly until you have 13 frames of your tag. Go back and click on the 1st frame. Select all.

Now click on the first frame of your animation and drag it onto the first frame of your tag. Drop it into place in the middle of the tag. If you goof you can undo both and try again, just making sure that both have all frames selected.

Once you have your animation placed go back to psp and click on Layers, View, Invert. Copy merged and paste as a new animation in AS.

Make sure you have Propagate Paste turned on, if you're unsure you can find it under Edit.

Now again your tag with the animation should have all layers selected with the 1st frame being highlighted. Click on the newly pasted frame with the top parts of your tag and drag and drop onto the first frame of your animated tag. You might have to undo and redo a few times to get it to be lined up just right.

Save your tag as a gif and congrats, you're done!

Friday, November 21, 2014

Siggy Showoff

I have several tags to show off today, made by other people, inspired by my tutorials.

This tag is made by Deb from my Sitting Pretty 2 tut.

This tag is made by Amber from my Red Poppy tut.

This tag is made by Genea from my Grid Weave tut.


The 2 tags above are from my She's A Star tut. I apologize I don't remember who made the first one. The second one is made by Genea.

Thank you ladies for the fantastic tags. If anybody else does any of my tutorials, please share with me your results and I'll post it on my blog. You can find my contact info above.

Thursday, November 13, 2014

Countdown - PTU - Animated

This tutorial was written by me on 11/13/2014 and assumes you have working knowledge of PSP. Any similarities to other tuts is purely coincidental and not done on purpose.


For this tut you will need:
PSP - I use version X3 but most versions will do
Tube of choice - I'm using the artwork of Steve Baier.
You can purchase this tube at CDO. Do not use this tube without purchasing a license first.
Scrap Kit of choice. I used ScrapWDD_IB-Pinoops-5-2, also available at CDO
Animation Shop
Font of choice, I used Gavotte Linotype Regular
Filters used:
Xero Porcelain
VanDerLee Snowflakes
Eye Candy 4000 Gradient Glow

Let's begin, remember to save often, especially if your psp is prone to shut down often, as mine does.

Open your template and tube in psp, duplicate and close the originals. This template has LOTS of layers so it is very important to label your layers as you go along. I'll try to keep this as non-confusing as I can.

Activate the Image 1 layer, flood fill with white and send to the bottom of your layer palette. Activate your raster 4 layer. Copy a paper of choice, I used paper 6. Paste as a new layer, resize as needed so it's smaller then your canvas size but bigger then the template layer. I resized mine 80%.

Activate your raster 4 layer again. Select all, float, defloat. Invert and click on the paper layer. Press delete and deselect. Delete the original raster 4 layer. Rename this layer Red Squares 1

Activate the merged layer (small red squares) repeat the steps above with a different paper, I used paper 5. Rename this layer Red Squares 2.

Repeat this process with the raster 3 and raster 1 layers. I used papers 4 and 3 respectively. So now the gold squares will be renamed Gold Squares, and the green renamed Green Squares, natch. So now if you did it like mine you should have the square's colors starting with top left going red, gold, red, green, and so on.

Now following the same color pattern, we're going to do the same steps above with the thin squares bordering the larger squares. So to make it easier to remember which papers go where, rename the layers now. Change raster 5 to Gold Outline. Raster 7 to Green Outline. Raster 6, Red Outline 1 (Use the same paper as red squares 1), and then finally raster 8 is renamed Red Outline 2 (using same paper as red squares 2).

Don't forget to delete the original layers and rename the paper layers again if needed. What I do is to activate the template layer, press delete on my keyboard, activate the paper layer above it and merge down 1 time. So now the paper layer has the correct name on it.

Now on to the numbers. You could follow the same color pattern, but I decided to make the numbers the same colors as the outline surrounding them. So the first square has a green outline, so it'll have a green number. Next red 1 outline, red 1 number, etc. Having your layers labeled, helps with this. Make sense? I hope so. lol Don't forget to rename the paper number layers. Oh and the last set of numbers, the layer is above the Copy of Raster 13 layer. Move it down in your layer palette so it's above your red outline 2 layer to make it easier if you like.

Ok so now your layer palette should look like this:


And your tag like this:


Ok now activate your raster 2 layer. It's the big green square. Select all, float, defloat. Go to Selections, Modify, Smooth. Apply with default settings. Add a new raster layer. Flood fill with black, deselect. Delete the original green square layer.

Do the same thing with the large square outline, which is raster 10, and the number 25, which is raster 12. I used paper 4.

Now hide these 4 layers: Raster 14 copy, Copy of Raster 15, Raster 14 Copy 2 and Copy of Raster 14. Now go to Layers, View and click on Invert. So now all you should see is the words Merry Christmas. Merge visible. Change your view back to All.

Activate Copy of Raster 13 and merge down 1 time onto the Raster 13 layer. Give this layer a slight drop shadow of 1, 1, 50, 5.

Let's go ahead and give a drop shadow to the 4 outline layers and 4 number layers. For these layers I did 0, 0, 70, 8.

Ok you still with me? Activate the flood filled black square in the middle of the template. Copy your tube and paste as a new layer. Resize if needed and arrange how you like it. It's currently under the large gold outline layer but that's fine so leave it there for now. Apply Xero, Porcelain at default settings but move the blue slider to 0. Give your tube a drop shadow of -3, 4, 60, 15.

Use your freehand selection tool to remove any part of the tube that is sticking out from the bottom of the gold outline:


Now you're going to activate the top layer in your palette, we're going to start adding elements from our kit.

Open element 1, copy and paste as a new layer. Resize 90%. Move down in your layer palette so it's under the black square, give it a drop shadow of 0, 0, 80, 10.

Open element 5, copy and paste as a new layer. Make sure it's at the top of your layer palette. Resize 40% and move to the bottom left corner of your tag, see my tag for reference. Give it the same drop shadow as above.

Open element 8, copy and paste as a new layer. Resize 40% and arrange on the bottom right corner of your tag, give same drop shadow.

Open element 24, copy and paste as a new layer. Resize 80% and arrange so it's under the black square but on top of the green branches. Duplicate and mirror.

Now before we go any further, let's resize our tag. If you choose not to resize, then skip this step. I resized mine 80%, all layers checked.

Add your copyright, license info and tagger's mark. Don't forget to credit the scrap kit if required.

Now let's fix our tube which is still under the gold outline. Activate your tube layer. Use your selection tool to select the part of the tube that is under the outline:


Promote selection to layer. Activate the tube layer and press delete one time on your keyboard, deselect. Click on the promoted layer and move it above the outline layer.

Activate the black square, rename it Snow. Give it the same drop shadow you did your elements. Make sure you click the box to apply the shadow to a new layer.

Now duplicate your Snow layer 2 times for a total of 3 layers. Name them from the bottom up as Snow 1, Snow 2 and Snow 3. Activate the large gold outline layer. Click inside with your magic wand. Expand selection by 3 and activate the Snow 1 layer. Apply VanDerLee Snowflakes with these settings, keep selected after you apply the filter:


Activate the Snow 2 layer, apply the filter but click the right arrow on Random Seed a few times.

Repeat with the Snow 3 layer, making sure you change the random seed again. You may now deselect. Hide Snow 2 and Snow 3 for now.

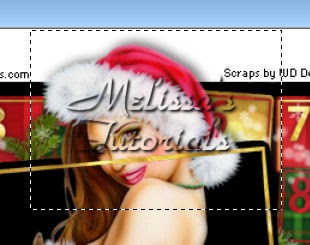
Activate the top layer of your palette again. Add your name using colors from your tube or scrap kit. Give it an inner bevel of choice, I used this one:


Then apply a gradient glow. I used this one with the glow width at 3:


Then apply a drop shadow to your name. I used -2, 2, 60, 10. Be sure you UNCHECK the box to apply shadow on a new layer.

Now to animate! If you choose not to animate you can delete the extra snow layers and the white background layer, merge visible and save as a png. Or merge all and save as a jpg. Otherwise, continue on to the next step.

All layers should be visible EXCEPT Snow 2 and Snow 3. Copy merged and paste as a new animation in AS. Back to psp, unhide Snow 2. Copy merged and paste AFTER current frame in AS. Back to psp a 3rd time, unhide Snow 3, copy merged and paste after current frame. Click on frame 1. Select all. Alt Enter to bring up the Frame Properties box, change the speed to 23.

Save your tag as gif, congrats you're done!

Saturday, November 8, 2014

Dragon Whisper - Animated Forum Tag

This tutorial was written by me on 11/08/2014 and assumes you have working knowledge of PSP. Any similarities to other tuts is purely coincidental and not done on purpose.


For this tut you will need:

PSP - I use version X3 but most versions will do
Tube of choice - I'm using the artwork of JM Leotti.
You can purchase this tube at CDO. Do not use this tube without purchasing a license first.
 Forum template 69 by Spawn
Animation Shop
Font of choice, I used Gaheris Demo
Filters used:
Mura Meister Copies
DBS Flux Bright Noise
Greg's Factory Output II Pool Shadow
Xero Porcelain
Eye Candy 4000 Gradient Glow

Let's begin, don't forget to save often.

Open forum template, duplicate and close original. Delete credits layer.

Copy your tube and paste as a new layer. Resize if needed, I resized mine 75%. Arrange where you like it. Mine is cut off on one side so I moved her over to the right so the cut portion doesn't show. Move your tube layer under your border layer.

Activate the main background layer. Copy and paste your tube again. Apply Mura Meister Copies, Wallpaper Rotate at default settings. Now I wanted more green showing on mine in the area opposite the main tube so I clicked undo and reapplied again till I got something I liked. So this is optional for you, depending on your tube.

Apply a Radial blur with these settings, and rename this layer Blur when done:


Activate the black lines layer. Add a new raster layer and flood fill with a medium color from your tube. I chose #353f2d.

Activate the black lines layer again. Select all, float, defloat and invert. Activate the flood filled layer and press delete. Deselect. You can now delete the original black lines layer. Or what I do is just delete what's on that layer and merge the flood filled layer down onto the now blank layer so it's still labeled properly.

Ok we're going to rearrange some layers here to make things a bit simpler. Click on the Top Light Twirl layer and bring it down in the layer palette so it's above the Bottom Light Twirl layer. Merge down and rename Light Twirl.

Now click on the Top Dark Twirl layer, bring it down in your layer palette so it's on top of the Bottom Dark Twirl layer. Again, merge down and rename Dark Twirl.

Finally repeat this same thing with the twirl dots layers.

Now activate your Dark Twirl layer. Select all, float, defloat. Add a new raster layer and flood fill with a color from your tube. I chose #687b53. Deselect. You can now delete the original dark twirl layer.

Repeat this same step on the light twirl layer using a lighter (or darker if you want) color from your tube. I used #949c63. Don't forget to delete the original layer when you're done. Apply DBS Flux Bright Noise at 30%, Mix selected.

You can change the color of the twirl dots but I opted to keep them black.

Now we're going to add some drop shadows. Activate your black lines layer again. Give it a slight drop shadow of 0, 0, 50. 5. Your Light Twirl layer is going to be a bit darker at 0, 0, 60, 10. And then finally a light drop shadow again on the dark twirl layer. I used, 0,0, 30, 5.

Now we're going to go down and activate our Blur layer. Duplicate this layer twice for a total of 3 layers. Rename them from the bottom as Blur 1, Blur 2 and Blur 3.

Activate the blur 1 layer and apply Greg's Factory Output II, Pool Shadow with default settings EXCEPT change the Center to 90, Intensity to 100 and the Lightness to 120.

Activate blur 2 and repeat the filter but change the Center to 130. Repeat with the blur 3 layer and the Center at 180. Hide the blur 2 and 3 layers for now.

Now activate your main tube layer. Apply Xero, Porcelain at default but change the blue slider to 0. Give your tube an overall drop shadow at 0, 0, 80, 15.

Activate your border layer. Select all. Add a new raster layer and flood will with black. Keep selected. Contract selection by 1. Fill with your dark color you used for the black lines. Contract by 2. Fill with black again. Contract by 1 and press delete. Deselect.

Activate the original border layer again. Select all, flood fill black. Contract by 4, press delete and deselect. Give this layer a gaussian blur at 3.

Add your copyright, license info and tagger's mark.

Add your name using colors from your tube. Give it an inner bevel, I used this one:


Then I gave it a gradient glow using these settings, with the glow width at 3:


And then finally a drop shadow, I used -2, 2, 50, 5.

Now to animate. If you choose to skip this step you can just merge all now and save as a jpg. Otherwise, continue.

Make sure that your blur 2 and blur 3 layers are still hidden. Copy merged and paste as a new animation in AS.

Go back to PSP, unhide blur 2, copy merged and this time in AS paste AFTER current frame. Easy way to do this is to press Ctrl Shift L.

Back to PSP again, unhide blur 3, copy merged and in AS, paste after current frame.

So you should now have 3 frames. Click on frame 1. Select all. Press alt enter to bring up the frame properties box. Change the speed to 20.

Save your tag and congrats, you're done!

Thursday, November 6, 2014

Red Poppy - Old School

This tutorial was written by me on 11/06/2014 and assumes you have working knowledge of PSP. Any similarities to other tuts is purely coincidental and not done on purpose.


I had a complete hard drive crash back in September. It was absolutely devastating as I lost everything. I'm in the process of getting back what I can but some things I'll never get back. This tag is one of the first tags I made after my crash. I had no filters at all and a small handful of tubes. I liked how this tag turned out so well that I decided to write a tut for it as soon as I was able. I have filters now but only made a small change on this one to use a gradient glow on the name. Everything else is 100% old school.

For this tut you will need:

PSP - I use version X3 but most versions will do
Tube of choice - I'm using the artwork of Jasmine Becket-Griffith.
You can purchase this tube at CDO. Do not use this tube without purchasing a license first.
 Mask 12 by WSL
Ding font Starz 2 
Font of choice, I used Whackadoo
Eye Candy 4000 Gradient glow
Let's begin, remember to save as you go.

Open a new image 550 x 550. Flood fill white. Copy your tube and paste as a new layer. Resize if needed.

Duplicate your tube and flip. Change the blend mode on the top tube to overlay. Merge Down.

Duplicate your merged layer and rotate 90 degrees to the left. Change the blend mode on this layer to hard light. Merge down again and you should have just 2 layers. The white flood filled and the layer with your merged tubes.

With your merged layer active, add mask from image and merge group.

Activate your text tool. Select your ding font. Change your foreground and background to a medium and dark color from your tube. So I used 2 shades of red from the poppies. Click on your foreground box and create a foreground-background gradient with the angle at 45, repeats 1. Invert will depend on your colors and if you want the darker color on the outside or inside. Click ok when done. And now set the background color to null.

Click on your canvas and type a capital I. Highlight the letter in the text entry box, change the size to something about as big as your mask layer. So for mine, the size is 550. So when your satisfied with how it looks, convert to raster and move it so it's centered on your mask. Give it a very slight drop shadow at 0, 0, 30, 5.

Copy your tube and paste as a new layer again. Resize so it's about the same size as your masked area. I resized mine 80%. Give your tube a darker drop shadow, I used -3, 3, 60, 10. Then I repeated the drop shadow at 1, -1, 50, 5.

Now you can add your copyright info how you like or if you want to do it on a curve like on my tag then follow these steps:

Change your foreground color to solid, with the background still null. Click on your Preset Shape/Ellipse Tool. Mode circle, width 3, create on vector and anti-alias checked.

Hold down your shift key and draw a circle about the size of your mask layer. Object, Align, Center in Canvas. If you need to adjust, click on the edit mode on the tools options bar. Keep this layer as a vector.

Click on your text tool again. Select your font for your credits. Add a new Vector layer, this is important. Be sure you change the text size back down to the proper size for adding credits. Change your foreground to null and your background color will be whatever color you want your credits to be in. Don't worry if this changed the circle, it won't matter when we're done. Put the alignment at center. Now hover your mouse over the top center of the circle until you see the curser change with a curved line under the A. Click and type out your credits. When you're done convert to raster and delete the vector layer with the circle.

Now activate your mask layer and click on your crop tool. Crop layer opaque.

Activate the top layer in your palette and add your name using foreground and background colors from your tube.

Give it an inner bevel of choice, I used this one:

Then give it a gradient glow, I used this one with the glow width at 3:


Finally give your name a drop shadow, I used -2, 2, 50, 5.

Delete the white layer, merge visible and save as a png or merge all and save as a jpg. Congrats you're done!

CT Tag - WD Designz


New WD Designz CT tag using her beautiful Heartless kit, which can be found at her store: http://whisprddesignz.com/store/


Tube by Vinegar which can be purchased at CDO:
http://www.cdoestore.com/

And extras by me, posted on my Fotki here:
 http://public.fotki.com/Q…/extras/cilmcdo/vinegar-heartless/