This tutorial was written by me on 11/13/2014 and assumes you have
working knowledge of PSP. Any similarities to other tuts is purely
coincidental and not done on purpose.
For this tut you will need:
PSP - I use version X3 but most versions will do
Tube of choice - I'm using the artwork of Steve Baier.
You can purchase this tube at CDO. Do not use this tube without purchasing a license first.
Scrap Kit of choice. I used ScrapWDD_IB-Pinoops-5-2, also available at CDO
Christmas Countdown template by Dee'Sign Depot
Animation Shop
Font of choice, I used Gavotte Linotype Regular
Filters used:
Let's begin, remember to save often, especially if your psp is prone to shut down often, as mine does.
Open your template and tube in psp, duplicate and close the originals. This template has LOTS of layers so it is very important to label your layers as you go along. I'll try to keep this as non-confusing as I can.
Activate the Image 1 layer, flood fill with white and send to the bottom of your layer palette. Activate your raster 4 layer. Copy a paper of choice, I used paper 6. Paste as a new layer, resize as needed so it's smaller then your canvas size but bigger then the template layer. I resized mine 80%.
Activate your raster 4 layer again. Select all, float, defloat. Invert and click on the paper layer. Press delete and deselect. Delete the original raster 4 layer. Rename this layer Red Squares 1
Activate the merged layer (small red squares) repeat the steps above with a different paper, I used paper 5. Rename this layer Red Squares 2.
Repeat this process with the raster 3 and raster 1 layers. I used papers 4 and 3 respectively. So now the gold squares will be renamed Gold Squares, and the green renamed Green Squares, natch. So now if you did it like mine you should have the square's colors starting with top left going red, gold, red, green, and so on.
Now following the same color pattern, we're going to do the same steps above with the thin squares bordering the larger squares. So to make it easier to remember which papers go where, rename the layers now. Change raster 5 to Gold Outline. Raster 7 to Green Outline. Raster 6, Red Outline 1 (Use the same paper as red squares 1), and then finally raster 8 is renamed Red Outline 2 (using same paper as red squares 2).
Don't forget to delete the original layers and rename the paper layers again if needed. What I do is to activate the template layer, press delete on my keyboard, activate the paper layer above it and merge down 1 time. So now the paper layer has the correct name on it.
Now on to the numbers. You could follow the same color pattern, but I decided to make the numbers the same colors as the outline surrounding them. So the first square has a green outline, so it'll have a green number. Next red 1 outline, red 1 number, etc. Having your layers labeled, helps with this. Make sense? I hope so. lol Don't forget to rename the paper number layers. Oh and the last set of numbers, the layer is above the Copy of Raster 13 layer. Move it down in your layer palette so it's above your red outline 2 layer to make it easier if you like.
Ok so now your layer palette should look like this:
Ok so now your layer palette should look like this:
And your tag like this:
Ok now activate your raster 2 layer. It's the big green square. Select all, float, defloat. Go to Selections, Modify, Smooth. Apply with default settings. Add a new raster layer. Flood fill with black, deselect. Delete the original green square layer.
Do the same thing with the large square outline, which is raster 10, and the number 25, which is raster 12. I used paper 4.
Now hide these 4 layers: Raster 14 copy, Copy of Raster 15, Raster 14 Copy 2 and Copy of Raster 14. Now go to Layers, View and click on Invert. So now all you should see is the words Merry Christmas. Merge visible. Change your view back to All.
Activate Copy of Raster 13 and merge down 1 time onto the Raster 13 layer. Give this layer a slight drop shadow of 1, 1, 50, 5.
Let's go ahead and give a drop shadow to the 4 outline layers and 4 number layers. For these layers I did 0, 0, 70, 8.
Ok you still with me? Activate the flood filled black square in the middle of the template. Copy your tube and paste as a new layer. Resize if needed and arrange how you like it. It's currently under the large gold outline layer but that's fine so leave it there for now. Apply Xero, Porcelain at default settings but move the blue slider to 0. Give your tube a drop shadow of -3, 4, 60, 15.
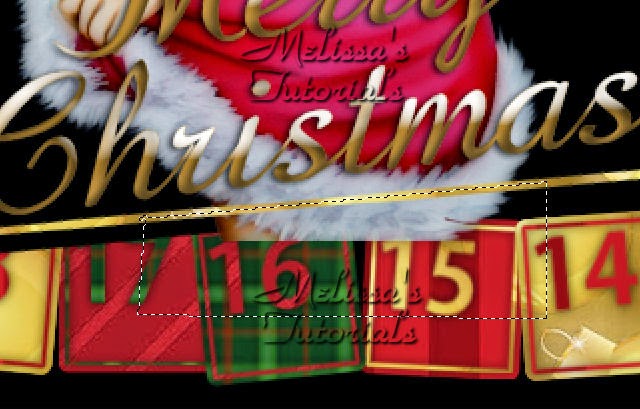
Use your freehand selection tool to remove any part of the tube that is sticking out from the bottom of the gold outline:
Now you're going to activate the top layer in your palette, we're going to start adding elements from our kit.
Open element 1, copy and paste as a new layer. Resize 90%. Move down in your layer palette so it's under the black square, give it a drop shadow of 0, 0, 80, 10.
Open element 5, copy and paste as a new layer. Make sure it's at the top of your layer palette. Resize 40% and move to the bottom left corner of your tag, see my tag for reference. Give it the same drop shadow as above.
Open element 8, copy and paste as a new layer. Resize 40% and arrange on the bottom right corner of your tag, give same drop shadow.
Open element 24, copy and paste as a new layer. Resize 80% and arrange so it's under the black square but on top of the green branches. Duplicate and mirror.
Now before we go any further, let's resize our tag. If you choose not to resize, then skip this step. I resized mine 80%, all layers checked.
Add your copyright, license info and tagger's mark. Don't forget to credit the scrap kit if required.
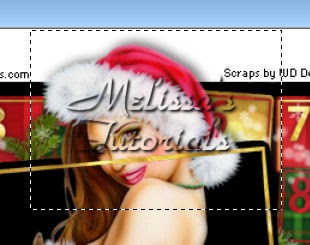
Now let's fix our tube which is still under the gold outline. Activate your tube layer. Use your selection tool to select the part of the tube that is under the outline:
Promote selection to layer. Activate the tube layer and press delete one time on your keyboard, deselect. Click on the promoted layer and move it above the outline layer.
Activate the black square, rename it Snow. Give it the same drop shadow you did your elements. Make sure you click the box to apply the shadow to a new layer.
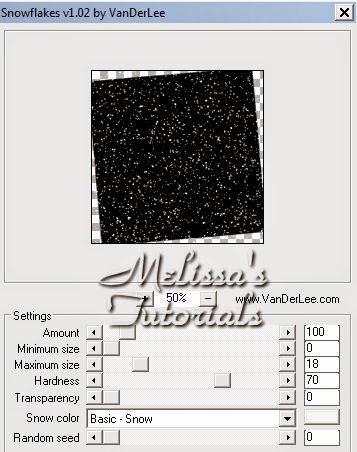
Now duplicate your Snow layer 2 times for a total of 3 layers. Name them from the bottom up as Snow 1, Snow 2 and Snow 3. Activate the large gold outline layer. Click inside with your magic wand. Expand selection by 3 and activate the Snow 1 layer. Apply VanDerLee Snowflakes with these settings, keep selected after you apply the filter:
Activate the Snow 2 layer, apply the filter but click the right arrow on Random Seed a few times.
Repeat with the Snow 3 layer, making sure you change the random seed again. You may now deselect. Hide Snow 2 and Snow 3 for now.
Activate the top layer of your palette again. Add your name using colors from your tube or scrap kit. Give it an inner bevel of choice, I used this one:
Repeat with the Snow 3 layer, making sure you change the random seed again. You may now deselect. Hide Snow 2 and Snow 3 for now.
Activate the top layer of your palette again. Add your name using colors from your tube or scrap kit. Give it an inner bevel of choice, I used this one:
Then apply a gradient glow. I used this one with the glow width at 3:
Then apply a drop shadow to your name. I used -2, 2, 60, 10. Be sure you UNCHECK the box to apply shadow on a new layer.
Now to animate! If you choose not to animate you can delete the extra snow layers and the white background layer, merge visible and save as a png. Or merge all and save as a jpg. Otherwise, continue on to the next step.
All layers should be visible EXCEPT Snow 2 and Snow 3. Copy merged and paste as a new animation in AS. Back to psp, unhide Snow 2. Copy merged and paste AFTER current frame in AS. Back to psp a 3rd time, unhide Snow 3, copy merged and paste after current frame. Click on frame 1. Select all. Alt Enter to bring up the Frame Properties box, change the speed to 23.
Save your tag as gif, congrats you're done!


No comments:
Post a Comment