This tutorial was written by me on 01/24/2016 and assumes you have
working knowledge of PSP. Any similarities to other tuts is purely
coincidental and not done on purpose.
For this tut you will need:
PSP - I use version X3 but most versions will do
1 or 2 tubes of choice, I'm using the art of
PinupToons, available at
CDO
Do not use this tube without purchasing a license first.
Scrap kit of choice. I'm using:
CDO 50 Shades Of Romance Collab 2016
Font of choice, I'm using Majestic
Filters used:
Mura Meister Copies
Xero Porcelain
Eye Candy 4000 Gradient Glow
For this tag, most of the scraps are from Babycakes's portion of this collab. Pieces from other designer's portions of the collab will be specified.
Let's begin, remember to save often so you don't lose your work.
Open your template, duplicate and close the original. Delete the top credit layer. Increase canvas size to 730 x 600. This gives us more room to work with. Activate and unhide the bottom white layer and flood fill in the extra space with white.
With your white layer still active, go to Layers, view, click on Current Only. Now unhide layers 13 and 14 and activate layer 13. Open a paper of choice, I used paper 4, copy and paste as a new layer. Resize if needed, I resize 60%, all layers unchecked. So it's only slightly bigger then the shape. Then move it so it covers the shape and activate layer 13 again. Select all, float and defloat. Invert selection, activate paper layer and press delete. You may now deselect.
Optional: Activate layer 13, press delete on your keyboard, this should make the layer empty. Click on the paper layer and merge down 1 time. Do this is with each layer that has paper added to it. This keeps all of our layers properly numbered and removes the slight grey outline around the paper.
Unhide layers 11 and 12. Repeat the steps above with layer 11 and a different paper from your kit. I used paper 1.
Unhide layers 7, 8, 9 and 10. Activate layer 7. Copy and paste another paper of choice. I used paper 2. Resize this one 65%. Duplicate paper and move the duplicate above layer 8. Hide the duplicate for now and activate layer 7 for now. We're going to do as we did before with layers 11 and 13. Except you'll use the duplicate paper on layer 8. Move layer 7 to just under layer 9.
Finally let's add a paper to layer 1. I used paper 3 and had to resize this one 70% as that's a wider rectangle. Activate layer 1 again, do the standard of select all, float and defloat. But before you go any further, arrange the paper if you want. I moved mine down on the tag so that the approximate center of the paper was over the center of the rectangle. When you have it how you like it then do the same as you did with the other shapes, inverting the selection and deleting the excess. Be sure to deselect when done.
I chose to leave layers 3 and 5 alone for my tag. You could add papers if you so choose.
Now we're going to add noise to layers 14, 12, 10, 9, 6, 4 and 2. Apply it with the settings at Uniform, 100% and monochrome checked. The same settings for all of those layers. To those exact same 7 layers, apply a drop shadow of 0, 0, 80, 10. Be sure you're only applying the shadow to the layers you applied the noise.
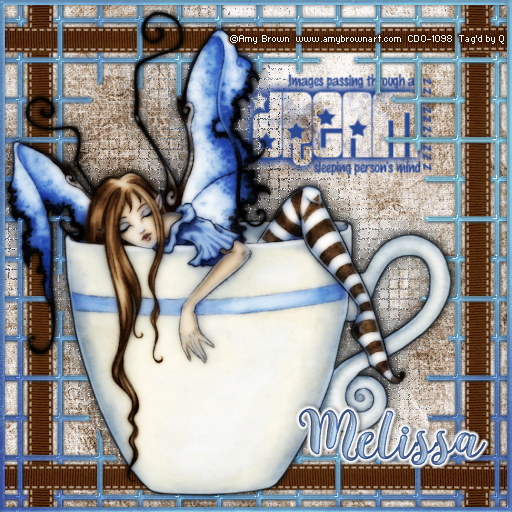
Ok so the template is done, let's add our elements. Make sure the top layer in your palette is active before you add each item. Give them all the same drop shadow as before unless otherwise specified, which is 0, 0, 80, 10. See my tag for reference on where to place each item.
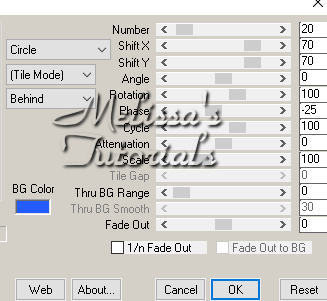
Element 22, resize 50%. Apply Mura Meister Copies with these settings. You might have to adjust them if you're using a different element. Oh and it's set to Encircle. Oops lol
Arrange this layer above your white background layer.
Element 28, arrange to the top right behind layer 6. See my tag for reference. Duplicate the layer and mirror. Do NOT drop shadow these layers.
Element 16, mirror and resize 60%. Arrange to the bottom left side of the tag on top of layer 1.
Element 8, mirror and resize 65%. Arrange in front of the heart.
Element 7, resize 95% and arrange on the bottom right side of the tag.
Element 30, mirror and resize 50%. Arrange in front of the thorny heart. When you drop shadow this one, make sure the opacity is 50.
Ok the rest of the elements are from other designer's portions of the collab.
From ChiChi Designs, the Net element. Resize 60%, arrange at the top right of the tag. Move this layer under the encircled element layer. Duplicate, flip and arrange at the bottom left. The drop shadow on these layers is 0, 0, 50, 5.
From Monti's Scraps, open element 10. Duplicate and close the original. Colorize with the hue and saturation at 0. Now we're going to use our Manual Color Correction tool. If you've never used this fantastic tool before, my friend Fi has a tut for it right
here.
So now we're going to change the color of this item from the grey to one that will match our tag. So for mine, since I'm using blues, I set the source color to #7a7a7a and the target color to #143fad. Now copy and paste your new colored element onto your tag. Arrange in the top left corner so only the part that looks like lumpy bricks are showing. Duplicate, flip and move this layer to the bottom right corner. Arrange both of these layers to just above the white background. Do NOT drop shadow these 2 layers
From Ladyhawwk Designs, element 7. Resize 80% and arrange above Layer 1 but below the 4 top elements you've added already. Do NOT drop shadow this layer either.
From Rebel Dezigns, element 4. We're going to colorize this one also to match the tag but we'll do this one slightly different. Before adding it to our tag, duplicate and close the original. Zoom in about 200% so you can better see what you're doing. Using your selection tool, draw a selection on just the candle part, ignoring the candle holder and the flame.

Now with the candle selected, promote to layer, activate the original and press delete, deselect. Working on the promoted layer, colorize it grey again like we did Monti's element. And we're going to use our manual color correction tool to change it to approximately the same shade of blue. So the source color to use is #464646. Keep the target color the same. When you're done merge the promoted layer back down onto the layer with the candle holder.
Copy and paste as a new layer on your tag. Resize 60%, arrange on the bottom right above the black lips. Duplicate and mirror.
So that's all of our elements, don't forget to give them the specified drop shadows (or not if stated).
Now it's time to add our main tube. Resize if needed, I resized 95%. Arrange her where you like her. Duplicate and hide the duplicate for now. On the original apply Xero Porcelain with default settings but change the strength to 98 and move the blue slider to 0. Give this layer a drop shadow of -3, 3, 60, 10. Repeat the drop shadow at 1, -1, 40, 5.
Activate and unhide the duplicate, give it a gaussian blur of 2. Change the blend mode to soft light, or one that fits your tube and reduce opacity to 60.
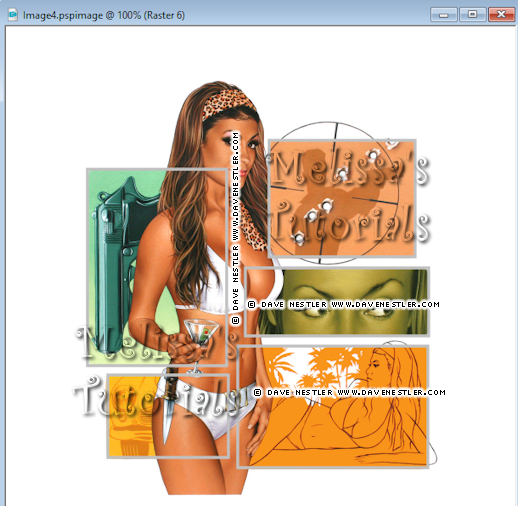
Now we're going to add a 2nd tube or you could use a close-up of your main tube. For my tag, the 2nd tube was the August 2015 bonus tube. Activate layer 3 in your palette. Copy and paste your tube as a new layer. Resize if needed. Arrange her so you can see her the part of her face you want in the top part of the black diamond. To make it easier, activate the black diamond layer, select all, float and defloat. Then arrange the tube where you want it.
When you have the tube on the left side arranged, deselect. Duplicate your tube and mirror. Move this layer down in your layer palette till it's above layer 5. Select all, float and defloat layer 5 and use that to arrange the right tube. When that's how you like it, invert selection, activate tube layer and press delete. Do that with the left tube layer as well.
The reason I had you wait till after both tubes are arranged to remove the excess is because you might want them in slightly different positions, as I did with my right tube.
Change the blend mode of both those tube layers to Luminance Legacy.
If you're going to resize your tag, now is the time to do it. I resized mine 70%, all layers checked.
Add your copyright, license and tagger's mark. Add scrap kit credits also, if required.
Add your name using your font of choice, colors from your tag/tube. If desired, while it's still a vector layer, grab the top middle node and drag it upwards, making your name taller.
Apply an inner bevel of choice, I used this one.
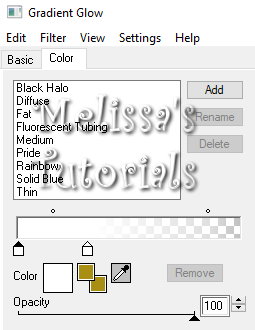
Give it gradient glow, I used these settings.
Then give your name a drop shadow, I used -2, 2, 50, 5. Delete the white background layer, merge visible and save as a png, or merge all and save as a jpg. Congrats, you're done!


