The links for the rotator sites have
been temporarily removed. CGIspy seems to have Malware on it's site
currently and is not safe to visit and the Ultra Randomization site is
completely gone. I apologize for any inconvenience and will update this
tutorial as soon as CGIspy is back or I find a better alternative.
Monday, October 28, 2013
Sunday, October 20, 2013
PTU - Mother Nature

This tutorial was written on 10/20/2013 and assumes you have working knowledge of PSP.
Any simularities to other tuts is purely coincidental and not done on
purpose.
For this tutorial you will need:
PSP - I use X3 but most versions will do
Eye Candy 4000 Gradient Glow
Tube of choice, I used the art of Martin Abel
You can purchase this tube at CDO. Do not use without purchasing a license first.
Inspired by scrap kit by Abstract Creations. Available for purchase at CDO.
Mask 2 from Moonbeams & Spiderwebs
Font of choice, I used Lainie Day
Open a new image 750 x 750, flood fill white. Copy frame 1 and paste as a new layer.
Click on your freehand selection tool, set to Point to point, feather and smoothing at 0 and you're going to carefully go around the frame like so:
Click on your freehand selection tool, set to Point to point, feather and smoothing at 0 and you're going to carefully go around the frame like so:

Open a paper of choice, I chose paper 1. Duplicate and close the original and resize down 70%. Copy and paste onto your workspace. Move this layer below the frame and arrange it so it fits. Invert selection and press delete. Keep selected.
Copy your tube and paste as a new layer. Move this layer under the frame and arrange it where it would sit best. Duplicate this layer and move the duplicate above the frame and hide for now. Activate the original and press delete. Deselect.
Activate your frame layer and give it a drop shadow: 0, 0, 80, 10. Activate the top tube and give it a drop shadow of -3, 3, 70, 10. Then repeat the drop shadow at 1, -1, 50, 5.
Now you're going to lower the opacity of this tube to about 40%. Zoom in about 400% and you're going to carefully erase any part of the lower section of the tube that sits on top of the bottom part of the frame. Pretty much from about waist/hips down. Don't erase any of her arms/hands, those stay on top of the frame. You want to be able to see the branches and leaves of the frame above the tube.

When you think you've got it all, return the opacity of the tube to 100% and hide and unhide the tube a few times while still zoomed in so you can remove any stray pixels you missed. Once you got them all, zoom back out to 100% again.
Now it's time to add elements, see my tag for reference on placements. Don't forget to add dropshadows after you add each item.
Element 16, resized 50%. Duplicate, mirror and move lower down. Element 10, resized 50%. Element 2, resized 40%, mirrored. Element 3, resized 30%, mirrored.
Activate the white layer and paste a paper of choice. I used paper 5. Apply your mask from image and merge group. With your mask layer still active, click on your crop tool and click on Snap crop rectangle to: Layer Opaque. Make sure it won't cut off any parts of tubes or drop shadows. Drag out any nodes if needed, then double click or click the green check mark to crop.
If you're going to resize your tag, now is the time to do it. I resized mine 75%.
Activate the top layer in your palette and add your copyright, license and tagger's mark.
Add your name using font of choice, colors from your tube/kit. I rotated mine 45 degrees to the left, gave it an inner bevel, gradient glow and drop shadow of -2, 2, 50, 5.
Activate the top layer in your palette and add your copyright, license and tagger's mark.
Add your name using font of choice, colors from your tube/kit. I rotated mine 45 degrees to the left, gave it an inner bevel, gradient glow and drop shadow of -2, 2, 50, 5.


All that's left to do is to delete the white background layer, merge visible and save as a png or merge all and save as a jpg. Congrats, you're done!
Monday, October 7, 2013
PTU - BCA Think Pink

This tutorial was written on 10/07/2013 and assumes you have working knowledge of PSP.
Any simularities to other tuts is purely coincidental and not done on
purpose.
For this tutorial you will need:
PSP - I use X3 but most versions will do
Eye Candy 4000 Gradient Glow
Tube of choice, I used the art of Jamie Kidd
You can purchase this tube at CDO. Do not use without purchasing a license first.
Think Pink scrap kit by Rebel Dezigns. Available for purchase at CDO.
Font of choice, I used Saginaw
Open a new workspace 700 x 700, flood fill white.
Open frame 2, copy and paste as a new layer. Resize 90%. Sharpen once. Copy paper 3 and paste as a new layer. Resize 60% so you can see some of the pink in the frame. Move this layer below your frame layer.
Copy your tube and paste as a new layer. Arrange it where you want it to sit in the frame, resizing if necessary. Duplicate this layer and move the duplicate above the frame. Hide for now.
Activate your frame layer. Click inside your frame with your magic wand and expand by 6. Invert selection. Activate your original tube layer below the frame, press delete. Then activate your paper layer and press delete again. Deselect.
Activate your frame layer and give it a drop shadow: 0, 0, 100, 8. Activate and unhide your top tube layer. Give it a drop shadow: -3, 3, 60, 10.
Lower the opacity on your tube to 50% and zoom in about 400% so you can easily see what your doing. Click on your eraser tool and carefully remove the parts of the tube that sits on the bottom part of the frame. Make sure you get any stray shadow and go over the frame enough so you can see the frame's drop shadow.
When you get up to the side where her hair blends in with her top, just go close to it without removing any hair, it'll get covered up with elements:

Now it's time to add our elements, see my tag for placements. Remember to drop shadow after you add each item.
Element 6.
Element 27, mirror and rotate to the left 45%.
Element 23, resize 50%, rotate 45% to the left and sharpen once. I also used the selection tool to remove the small flower on the right, but this is optional.
Element 2, resize 80%.
Element 21.
Element 30, resize 40%.
Element 14, resize 30%.
Element 17, resize 40%.
Element 10, resize 25%.
Element 18, resize 40%

Open frame 2, copy and paste as a new layer. Resize 90%. Sharpen once. Copy paper 3 and paste as a new layer. Resize 60% so you can see some of the pink in the frame. Move this layer below your frame layer.
Copy your tube and paste as a new layer. Arrange it where you want it to sit in the frame, resizing if necessary. Duplicate this layer and move the duplicate above the frame. Hide for now.
Activate your frame layer. Click inside your frame with your magic wand and expand by 6. Invert selection. Activate your original tube layer below the frame, press delete. Then activate your paper layer and press delete again. Deselect.
Activate your frame layer and give it a drop shadow: 0, 0, 100, 8. Activate and unhide your top tube layer. Give it a drop shadow: -3, 3, 60, 10.
Lower the opacity on your tube to 50% and zoom in about 400% so you can easily see what your doing. Click on your eraser tool and carefully remove the parts of the tube that sits on the bottom part of the frame. Make sure you get any stray shadow and go over the frame enough so you can see the frame's drop shadow.
When you get up to the side where her hair blends in with her top, just go close to it without removing any hair, it'll get covered up with elements:
When you're all done, return the opacity of your tube to 100% again and hide and unhide the layer a few times to check for any stray pixels you missed. Zoom back out when done.
Now it's time to add our elements, see my tag for placements. Remember to drop shadow after you add each item.
Element 6.
Element 27, mirror and rotate to the left 45%.
Element 23, resize 50%, rotate 45% to the left and sharpen once. I also used the selection tool to remove the small flower on the right, but this is optional.
Element 2, resize 80%.
Element 21.
Element 30, resize 40%.
Element 14, resize 30%.
Element 17, resize 40%.
Element 10, resize 25%.
Element 18, resize 40%
Open wordart 4 from Rosa. Merge visible and paste as a new layer on your tag. Resize 60%.
Open paper of choice, I decided to use the same paper I used in the frame. Paste as a new layer, add mask from image. Merge group. Move this layer just above your white layer. Click on your Raster Deform tool and drag the nodes out on all 4 sides so you can see more of the mask. Make sure they all extend beyond any elements or drop shadows. When satisfied crop layer opaque.
Open paper of choice, I decided to use the same paper I used in the frame. Paste as a new layer, add mask from image. Merge group. Move this layer just above your white layer. Click on your Raster Deform tool and drag the nodes out on all 4 sides so you can see more of the mask. Make sure they all extend beyond any elements or drop shadows. When satisfied crop layer opaque.
Now if you want to resize your tag, now is the time to do it. My example on this page is original size but for my personal tags, I resized down 80%, all layers checked.
Add your copyright, license and tagger's mark. Don't forget to credit your scrap kit.
Add your name using colors from your tag. I used #973664 for the foreground and #eb73ac for the background. Give it an inner bevel of choice, I used:
Add your copyright, license and tagger's mark. Don't forget to credit your scrap kit.
Add your name using colors from your tag. I used #973664 for the foreground and #eb73ac for the background. Give it an inner bevel of choice, I used:
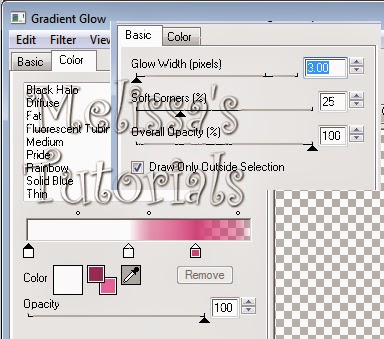
Then give it a gradient glow. The color is #db5993.
And finally a drop shadow, I used -2, 2, 50, 5.
Delete the white background layer, merge visible and save as a png or merge all and save as a jpg. Congrats, you're done!
And finally a drop shadow, I used -2, 2, 50, 5.
Delete the white background layer, merge visible and save as a png or merge all and save as a jpg. Congrats, you're done!
Subscribe to:
Posts (Atom)