I rewrote one of my old tuts that was originally written way back in 2008. I had posted it here to my blog in 2010. Well along the way I had lost the original example tag and the screenshots. It's now been completely redone and you can find it here.
Showing posts with label Amy Brown. Show all posts
Wednesday, September 5, 2018
Sunday, April 20, 2014
Mermaid - FTU
This tutorial was written by me on 04/20/2014 and assumes you have
working knowledge of PSP. Any simularities to other tuts is purely
coincidental and not done on purpose.
For this tut you will need:
PSP - I use version X3 but most versions will do
Animation Shop
Tube of choice - I'm using the artwork of Amy Brown. You can buy it from CDO
Do not use this tube without purchasing a license first.
04/18 Scrap Friday Grab Bag Freebie, scroll to bottom of page
Tube of choice - I'm using the artwork of Amy Brown. You can buy it from CDO
Do not use this tube without purchasing a license first.
04/18 Scrap Friday Grab Bag Freebie, scroll to bottom of page
Font of choice, I used Miss Le Gatees
Eye Candy 3.0 HSB Noise
Eye Candy 4000 Gradient Glow or any other filter with a gradient glow
Let's begin, remember to save often.
Open a new image 600 x 600, do NOT flood fill with a color, we'll fix that later. Open frame 1 from your grab bag scraps. Copy and paste as a new layer, resize 70%, all layers unchecked.
Open paper of choice, I used paper 6. Copy and paste as a new layer. Resize 55% and move below the frame layer. Activate the frame, click inside with your magic wand, expand by 6. Invert selection, activate the paper layer and press delete. Deselect. Give the frame a drop shadow of 0, 0, 80, 5.
Copy your tube and paste as a new layer. Make sure this layer is at the top of your layer palette. Give her a drop shadow of -3, 3, 60, 10, shadow on a new layer checked. Activate the tube layer again and repeat the drop shadow at 1, -1, 30, 5, again with the shadow on a new layer. Shadow 2 should be active, merge down one time.
Activate the tube layer again, and hide all layers except the tube. We're going to do some selecting so be sure to save your progress.
Zoom in about 500% and click on your freehand selection tool, set to point to point. Mode set to add, feather and smoothing at 0. We're going to select around the mermaid tail, start by selecting around the parts that are easy to get:
Now we're going to select around the harder parts, just carefully go along the lines, you can undo if you need to:
Once you have the entire tale selected, promote selection to layer. Deselect and duplicate this layer 2 times for a total of 3. Rename them from the bottom up as Tail 1, Tail 2 and Tail 3.
Activate the Tail 1 layer and go to Eye Candy 3.0, HSB Noise, apply the settings below:
Activate Tail 2, apply the filter again but change the random seed to 50. Repeat the filter on Tail 3 and change the random seed to 80.
Unhide the frame and tube shadow layers. Activate the tube shadow layer and click on your crop tool, crop layer opaque but make sure you don't crop off any part of the frame. I had to drag the bottom node down a bit to keep from cutting it off.
If you're going to resize your tag, do it now. I resized 90%, all layers checked.
Now hide all layers except the paper and frame layer. Activate the frame layer and duplicate, move the duplicate down below the original frame and hide the original frame layer. Lower the opacity on the duplicate frame to 40. Copy merged and paste as a new image in Animation Shop.
Click Effects, Insert Image Effect. Select Underwater and click on Customize, use these settings:
Click ok twice. The effect has now been applied. Delete the first and last frames in your animation. You should now have 9 frames. Scroll to the beginning and activate frame 1. Select all and minimize for now.
Back to psp. Hide the frame duplicate layer and the paper layer. And unhide all other layers except Tail 2 and Tail 3. Activate the top layer in your palette. Add your artist copyright, license info and tagger's mark.
Add your name using colors from your tube. Give it an inner bevel of choice, I used:
Then a simple white gradient glow with the glow width at 3:
Then give your name a drop shadow, I used -2, 2, 60, 10. Make sure you uncheck the shadow on a new layer box.
Now make sure these layers are hidden: Tail 2, Tail 3, the duplicate frame and the paper layer. The rest all need to be visible. Copy merged and paste as a new animation in AS. Back to psp, hide Tail 1 and unhide Tail 2. Copy merged and paste AFTER current frame in AS. Back to psp, hide Tail 2 and unhide Tail 3. Copy merged and paste AFTER current frame in AS.
You'll now have 3 frames. Click on frame 1 and select all. Copy, click on frame 3 and paste AFTER current frame. Click on frame 6 and paste AFTER current frame again. You should now have 9 frames. Scroll back and click on frame 1. Select all.
Unminimize your previous animation you made with the underwater effect. Frame 1 should be active and all frames selected. So now you're going to click on the first frame of your animation with the tube and text and drag it onto the first frame of the animation with the water effect. Line up the frame so it sits on top of the one with the lowered opacity and release the mouse button to drop into place. All 9 frames should of moved over to the exact location. If not, then undo and try again.
While all frames are still selected, press Alt Enter to bring up the frame properties box. Change the speed to 17. Then press Shift Alt Enter to bring up the animation properties box. Click on Opaque and change the color to white. Click ok and now your animation has a white background.
Save your tag and congrats, you're done!
Friday, December 7, 2012
5 new tags plus new avatar to share
This tag is from a tut by Chas at chasscrapnbitz. You can find it here. I've had this link for probably a month but now have been holding back on doing it until I found a good tube to match. I have the exact tube she used in the tutorial and it's gorgeous but I try not to use the same tube if I can help it.
This next tag is from a tut on Freebie Friends, you can find it here.
This great PUT tag is from a tut by Jazzed Up Junk. You can find it here.
Last but not least, this adorable forum set is from a tut by Love Shack. You can find it here. I also made avatars to share and you can find them here.
Tuesday, November 27, 2012
3 new tags, 1 Forum set plus sharing new avatar
This first tag is from a tut by Bright's Kreationz. You can find it here.
The forum set below is also from Bright. Though don't know if it could be classified as a tut, plus it's very poorly written sadly. But you can find it here.
I've also made a bunch of avatars like the one above to share. Most common letters are there. You can find them here.
This cute tag is from a tut by Capricorn Caz. You can find it here. Though her animation instructions are confusing, I'll warn you now. Her blog drives me bonkers, it's super wide (and I've got a wide screen monitor and still have to scroll to the side) plus she's only got 1 post per page, very frustrating when you're looking through stuff on her blog.
This tag is from a tut by Chas Designs. You can find it here. This is another one who's blog is frustrating. She's got a blog and a website, and the same tuts are posted in both places, which makes it confusing. Even more so, she's got a lot of Christmas/Winter tuts, only almost all of them are so old that the scrap kits used aren't even available anymore. It's enough to make you pull your hair out.
If one of my older tuts used a kit or whatnot that was no longer available I'd either pull it, rewrite it with a new kit or at the very least post a note that the kit is no longer available, but maybe that's just me.
Saturday, August 25, 2012
8 New Tags
Hello readers, I have 8 tags with links to share with you today.
This next tag is from a tut by Gwils at Creative Addictions. You can find it here. She does not provide a direct link to the kit and it took me awhile to find it, so to make it easier, you can find the kit here.
This next tag is from a tut by Beth at JBeths Diversionz. You can find the tut here.
This sweet tag is from a tut at Tutorials by Sue. You can find it here.
This tag is from a tut by Serena at PSP Fantastic. You can find it here.
I have 1 more but I want to finish getting the tut for it written before I post it, so be on the lookout for it, hopefully within the next couple days.
Saturday, December 11, 2010
Several new tags
These next two are from tutorials on the Creative Addictions forum. You can find these tuts here and here.
Monday, November 22, 2010
Grid Weave
This tut was originally written in 2008, but I lost the example tag and screenshots that were posted to Photobucket. The tut has been rewritten on 09/04/2018 with all new images.
Supplies needed:
PSP - I use version X9 but most versions will do
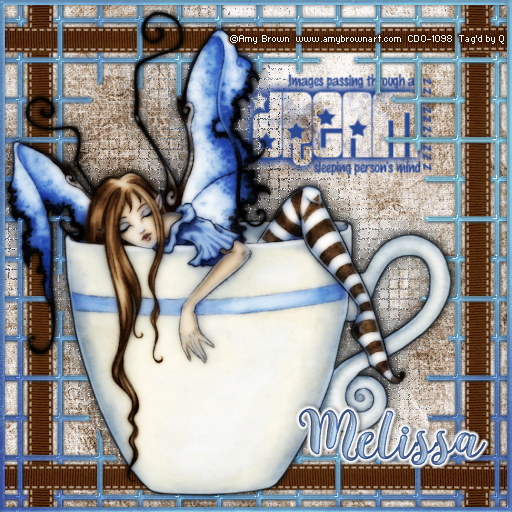
Tube of your choice, I'm using the art of Amy Brown, this tube was purchased at CDO, unfortunately she is no longer selling there
Do not use this tube without purchasing a license first
2 papers of choice
Grid tube from Dozi here (It's the 1st kit on the page)
Brush of choice
Ribbon Tube here
Font of choice, I'm using Hydrangea
Filters used:
Coconut Ice SBP preset here
Xero Porcelain
Eye Candy 4000 Gradient Glow
Remember to rename your layers as you go. This tut has many layers and it'll help keep them straight. Don't forget to save as you go. Let's begin.
Open the grid tube, papers and your main tube. Shift D to make duplicates on all tubes and papers, close all originals.
On the grid tube, delete all layers except Layer 1. Resize 40%, all layers checked. Rename Grid. Add a new raster layer, flood fill white, send to the bottom of the layer palette.
Select one of your papers. Copy and paste as a new layer. Move this layer under your grid layer. Rename Paper.
Select your 2nd paper and copy. Activate the grid layer, Select all. Selections, float, defloat. Paste your paper into selection. Keep selected. Apply Super Blade Pro with the M_Coconutice preset. Deselect. Give it a drop shadow. I used 0, 0, 50, 5.
Copy and paste your main tube as a new layer on top of your grid. Resize as needed, all layers unchecked. Place it where you want it to sit. Duplicate your tube twice for a total of 3 layers. Hide the duplicates and activate the original.
Give it a gaussian blur with a radius of 10. Then apply Mosaic Antique with default settings. Change the blend mode to Multiply or one that suits your tube and colors of your paper. Rename Mosaic Tube
Move this layer below the grid layer. Activate and unhide your middle tube layer, rename Main Tube. Apply Xero, Porcelain with default settings but move the blue slider to 0. Give it a drop shadow. -2, 2, 50, 10.
Activate and unhide the top tube layer. Give it a guassian blur of 2. Change the blend mode to Overlay or one that suits your tube. Rename Blur Tube
Select ribbon tube. Colorize with both values set to 0. Using your Manual Color Correction tool, change it to a color to match your tube. The source color is #dfdfdf. Your target color will be the color you want it to be. I chose a nice chocolate brown color from her hair.
Hide the top 2 tube layers for now. Copy and paste the ribbon as a new layer on your workspace. Resize 22%, all layers unchecked. Move this layer above the grid layer. Move it into position so it's over part of the grid like below, with one end of the ribbon off the edge of the canvas. Zoom in if necessary, if needed to better see what you're doing.
Duplicate the ribbon and mirror. Merge down 1 time. Rename Ribbon Bottom.
Duplicate this layer. Image, Flip, or mirror vertically, depending on the version of psp you use. It will not be lined up perfectly on the top so, use your mover tool to align it up with the top part of the grid, so it matches the bottom. Rename Ribbon top
Duplicate this layer. Image, Rotate, Free Rotate 90 to the left. Move it over to the right side of the grid. Rename Ribbon Right. Drag this layer under the Ribbon Bottom layer. Duplicate and mirror. You should now have a 4th ribbon on the left side. Move it into position. Everything should be lined up like this. The 2 horizontal ribbons, should be on top of the 2 vertical ribbons.
Hide all the other layers EXCEPT the 4 ribbon layers. Make sure one of your ribbon layers is active and merge visible. Rename this layer Main Ribbon. Unhide the grid layer and the white background layer only. Make sure your ribbon layer stays active. Give it a drop shadow of 0, 0, 80, 2. New layer unchecked.
Now here's where it's going to get tricky. Click on your selection tool. Set to Rectangle, Add, feather at 0. Starting at the top left corner, zoom in about 800% so you can see what you're doing. Draw a selection around the 2nd rib in the grid going down from the top, like this, allowing some allowance all the way around the ribbon to account for the drop shadow:
Promote selection to layer. Activate the main ribbon layer and press delete. Deselect. Move the promoted layer under the grid layer.
Now you're going to skip a rib and do the same thing to the 2nd one down from the one you just did. Make sure that you activate the main ribbon layer each time. Work your way around the grid doing every other rib as you go. When you get to the bottom left corner and you're ready to do the bottom horizontal section of the ribbon, start with the 1st rib on the grid instead of the 2nd. Bottom right corner, going up, start on the 2nd rib like you did the top left corner. But when you get to the top right corner, start on the 2nd rib, not the first. Do the horizontal ribbons like this so that they go over the broken ribs instead of under them.
Very important to save OFTEN when doing this so you don't lose your progress.
When you're done, zoom back out to 100% . The ribbon will now appear to be woven in and out of the grid, like so:
Now you should have about 25 promoted selection layers. Hide the main ribbon, grid and white background layers. Make sure one of your promoted layers is active and merge visible. Rename this layer Under Ribbon.
You can now unhide all layers. Activate the top layer in your palette, it should be your blur tube. Add a new raster layer. Click on your Brush tool and find your brush. Select a foreground color from your tube. Apply your brush where you want it to go. Move this layer below your grid layer.
Activate the top layer in your palette again. Add a new raster layer. Select all. Selection, Modify, Contract by 5. Selections, Invert. Copy the paper you used for your background and paste into selection. Apply the same SuperBladePro preset as before. Deselect. Apply the same drop shadow you used for the grid.
Add your artist copyright, license and tagger's mark. Don't forget to credit the scrap kit if necessary.
Add your name using font of choice, foreground and background colors from your tube. Move into position and convert to raster. Select all, Selections Float, Defloat. Apply the same SuperBladePro preset you used for the grid. Deselect. Apply a gradient glow with the glow width at 3.
Finally, give it a drop shadow, I used 0, 2, 50, 5.
Merge all and save as a jpg. Congrats, you're done!
Tutorial ©Queina 2008, 2018. All rights reserved. Any simularities to any other tutorials is purely coincidental.
Subscribe to:
Posts (Atom)