This tutorial was written by me on 06/17/2013 and assumes you have working knowledge of PSP. Any simularities to other tuts is purely coincidental and not done on purpose.
For this tut you will need:
PSP - I use version X3 but most versions will do
Template from
Scrap It Studio It should be the first on the page
Scrap Kit: IB-Deacon Black-77-3 from
CDO
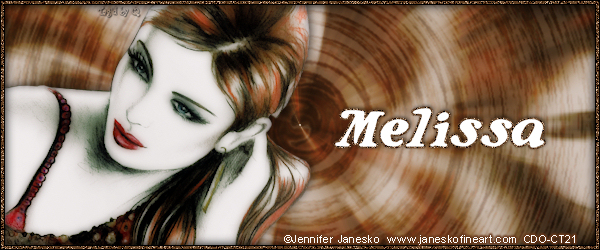
Tube of choice: I used the art of
Martin Abel. You can buy this tube at CDO
here
WSL_Mask81 from
WeeScotsLass. You can find links to download most of her mask in the right hand column
Xero - Porcelain
Eye Candy 4000 - Gradient Glow
Font of choice, I used:
MargaritaVille
Open template in psp, duplicate, close the original and delete the © layer. Now we're going to do some modifications on our template. Remember to save as you go.
In your layer palette, click on the Player layer. Move it down till it's under the Top Left Frame Mat layer. It should now be directly above the Menu Mat layer.
Now click on the Left Chrome Frame layer. You'll see that she didn't make the frame all the way around. So we're going to fix that. Duplicate this layer and mirror. Move it back over so it lines up with the original. An easy way to make sure it's lined up right is to click on your Raster Deform tool. Look at Position X and Position Y. X is horizontal, Y is vertical. Compare the 2 layers and click on the up or down arrows till both numbers match up on both layers. So for mine, both layers at are X: 31 and Y: 40.
Now click on your selection tool. Make sure you're on the duplicate layer. You're going to draw a selection around part of the frame like so:

Then press delect and deselect. It should look something like this.

Your copy of the left frame should still be active. Merge down 1 time.
Now we're going to repeat the process with the Bottom Chrome Frame layer.
Now over to our scrap kit, open element 18, duplicate and close the original. I'm only going to use the speakers part, not the stands. So again using my selection tool, I'm going to draw a selection starting with the left speaker, just under the speaker and down over the stand, like so:
It might help to zoom in a bit so you can see the underside of the speaker better. Press delete when done. You can undo and try again if you goof. When you get one done, do the same for the other speaker. You can use your mover tool to move them down on the canvas. Then draw your selection around 1 of the speakers, cut and paste as a new layer on your template.
Depending on which one you moved over first, place it over either the left or right chrome frame so that the design on the side of the speaker is on the inside. See my example tag for reference. Now resize the speaker 105%, all layers unchecked. That should make it so it covers the entire opening of the frame. Then move it down in your layer palette so it's under the frame. You might need to adjust it's placement again so that it's centered. Rename the left speaker Speaker 1 and the right speaker Speaker 2.
Open paper 2 or one of choice. Duplicate and close the original. Resize 50%. Copy and paste as a new layer on your template. Now activate the Left Square layer. Click on it with your magic wand. Move your paper so it's over the square where you like it. Invert selection and press delete. Deselect. Activate the Left Square layer again. Press delete on your keyboard, the box will go away. Activate the paper layer above it and merge down. Now repeat with the Right Square layer, using same paper.
I did the same thing with the Left/Right Bars layer with paper 3, resized to 60%. For the Top Bar and Bottom Bar layers, I used paper 5 resized to 50%. Then finally for the Player layer I used paper 1, resized to 70%. Do not use your magic wand for this layer though. Instead You're going to select all, float, defloat, then invert the selection after you pasted your paper. Delete and deselect.
Ok starting from the bottom with the Bottom Bar layer. You're going to give a drop shadow of 2, -2, 70, 5 to the following layers: Bottom Bar, Left Square, Left/Right Square, Player.
Then you're going to change your drop shadow to -2, 2, 70, 5 and apply it to these layers: Top Bar, Right Square, Left/Right Bars, Player.
Now you're going to drop shadow your Chrome Frames. First with -1, -1, 70, 5. Then again with the horizontal and Vertical at 1.
Hit the save button, we're half done. lol
Activate the Music layer. Select all, float, defloat. Add a new raster layer and flood fill with a color from your tube or kit. I used #b69bba. Deselect. Do like with did with the other layers, activate the music layer again. Press delete. Activate the flood filled layer and merge down. Give it a drop shadow of 2, 2, 70, 5.
I did the same thing with the Music Text layer and the Let The Text layer using paper 5 again, resized to 50%. Now before you drop shadow those two layers, click on your white background layer. Select all and crop to selection. This gets rid of any excess paper that might of been off the canvas. Otherwise you get that ugly dark shadow along the edges. So once that's done give those 2 text layers the same drop shadow you did the Music layer.
For the Move You layer, I flood filled with a nice bright color from the speakers: #dfbee3. Again same drop shadow as before.
I deleted the 3 note layers and instead decided to use element 2 from my kit, resized 40%. Place near the top of your tag, then duplicate, mirror and move down near the bottom. See my tag for reference. Give same drop shadow as before.
Copy your tube and paste as a new layer on your tag. Resize if needed. Arrange her in the layer palette where you want her to sit. (I had to rearrange some of my layers so she'd be on top of the left chrome frame, but under the right chrome frame.) I also added element 7, resize 60%. Place at the bottom middle of your tag. This was to cover the bottom of her legs which are cut off. I gave the keyboard a light drop shadow of 0, 0, 70, 10.
Activate your tube layer. Apply Xero, Porcelain at default settings but move the blue slider to 0. I then gave her a larger drop shadow of -3, 3, 60, 10. Then again at 1, -2, 50, 5.
Resize your tag if desired. I resized my tag 80%. Then I increased the canvas size to 520 x 520. Open up paper of choice, I used paper 2. Resized it 80% and pasted as a new layer on my tag. Move it to just above the white background.
Open up your mask. If using the same mask as me, duplicate and close the original. Select all. Contract by 20. Crop to selection. Then make sure your tag is active and add a new mask layer from image, make sure you're selecting the mask in the drop down menu and apply. Merge group. Duplicate the mask layer and merge down. The reason I altered the mask is cause otherwise you couldn't see it behind the tag.
Add your copyright, license info and taggers mark.
Select your font, foreground and background colors from your tag. Add your name. Give it an inner bevel:
Then give it a gradient glow. The basic tab at 3, 25, 100, the box checked. Then the color tab like this, the dark color is the same color I used for the foreground on my name:
I then gave my name a drop shadow of -1, 1, 50, 5.
Merge visible and save as a png or merge all and save as a jpg. Congrats, you're done!