This tutorial was written by me on 01/21/2018 and assumes you have working knowledge of PSP. Any similarities to other tuts is purely coincidental and not done on purpose.
For this tut you will need:
PSP - I use version X6 but most versions will do
Tube of choice, I'm using the art of
Barbara Jensen
Do not use this tube without purchasing a license first
Scrap kit of choice, I'm using an IB kit from
Creative Scraps by Crys, available at CDO
Mask of choice, I'm using
DD_GeoMask_3
Font of choice, I'm using MADE GoodTime Script
Filters used:
Xero Porcelain
Xero Radiance
Eye Candy 4000 Gradient Glow
Let's begin, don't forget to save often.
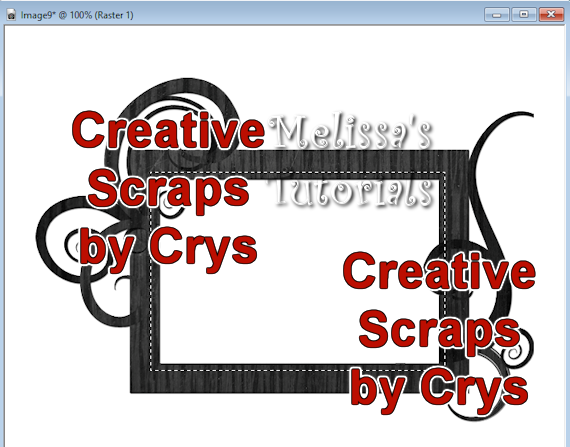
Open Frame2a, duplicate and close the original. Increase canvas size to 700 x 600, placement center. Rename this layer Frame. Add a new raster layer, flood fill white and send to the bottom.
Activate the frame layer. Click on your selection tool, draw a selection a little larger then the inside of the frame:

Open a paper of choice, I'm using paper 5. Duplicate, close the original. Resize so it's a little bigger then the selected section of your frame. I resized mine 60%. Copy and paste as a new layer on top of your frame. Move this layer under the frame layer, invert selection and press delete. Deselect. Rename this layer Frame Back.
Activate your frame layer again. Give your frame a drop shadow of 0, 0, 60, 15. Copy your tube and paste as a new layer, resize if needed. Arrange your tube how you want it to sit. Duplicate this layer, hide the duplicate for now and we're working on the original. Apply Xero Porcelain with default settings but move the blue slider to 0. Unhide and activate the copy of the tube. Apply Xero Radiance with default settings. Change the blend mode on this layer to Soft Light with Opacity at 80%. These settings work with this tube that I am using, different settings might work better with your chosen tube.
Activate the original tube layer and give it a drop shadow of 0, 2, 60, 10. Give it a second drop shadow of 1, -2, 50, 5.
Activate your frame layer. Now let's add our elements. Open Leaves, copy and paste as a new layer. Resize 70% all layers unchecked, mirror and place on the left side of the frame. Rename this layer Leaves 1. Open Leaves 2, copy and paste as a new layer. Resize 75%, mirror and place on the right side of your frame and move down below the Frame Back layer. See my tag for placement. Rename this layer Leaves 2. Drop shadow both leaves layers 0, 2, 50, 5.
Activate the top layer in your palette. Open the Flowers element, copy and paste as a new layer. Resize 60%. Rotate 40 to the right. Place on the left side of the frame and move this layer so it's sitting on top of Leaves 1. Arrange it how you like it and give it the same drop shadow as before. There was a little bit of the stem sticking out below my tube's head, so I just used the selection tool to get rid of it. Rename this layer Flowers.
Open Vines. Copy and paste as a new layer. Resize 60, rotate 60 to the right. Place on the right size of the frame, under the original tube layer. Rename Vines and give same drop shadow.
Open Birdcage. Copy and paste as a new layer. Resize 70%. Arrange in the middle of the frame, just above the frame layer. You want the top sticking up quite a bit above the top of the frame. See my tag for reference. Same drop shadow. Rename this layer Birdcage.
Open Ribbon. Copy and paste as a new layer. Flip this layer, arrange at the bottom of your tag, under the original tube layer. Same drop shadow. Rename Ribbon.
Open Wordart. Copy and paste as a new layer. Resize 75%. Arrange near the top of the tag but under the original tube layer, see my tag for reference. Apply Eye Candy 4000, Gradient Glow with a Fat white glow. Give it the same drop shadow but change the vertical to -2.
Hide the white background layer. Click on your crop tool and crop Merged Opaque. Increase the canvas size to 700 by 600 again. You can now unhide the white layer and flood fill again if desired. Make sure this white layer is active.
Open a paper of choice, I'm using paper 2. Copy and paste as a new layer. Add Mask from image. Source Luminance and invert mask data unchecked. Merge group. Delete the white layer and crop Merged Opaque once more.
If you're going to resize your tag, now is the time to do it. I resized mine 80%, all layer checked.
Activate the top layer in your palette. Add your artist credits, license, scrap credits if required and watermark. If you like to make a blank so you can add multiple names later, then save it now with layers fully intact. I save mine as a psd file. Then duplicate and we'll be adding a name to the duplicate tag so we don't accidently save over the original.
Add your name using chosen font. Make the background a color from your tag/tube. I chose to leave my foreground null but you might do different depending on your font. When you get your name placed where you like it, give it an Inner Bevel:
Then give it a Gradient Glow, I used these settings with the glow width at 3.
Then give your name a drop shadow. I used 0, 2, 50, 5.
Merge visible and save as a png or merge all and save as a jpg. Congrats, you're done!
I have created a matching wallpaper, you can download that
HERE and a matching Incredimail Stat. Click the preview below to download.


